Interim, In Situ Additive Manufacturing Inspection
manufacturing
Interim, In Situ Additive Manufacturing Inspection (MFS-TOPS-70)
Image-based method for real-time property inspection of printed parts
Overview
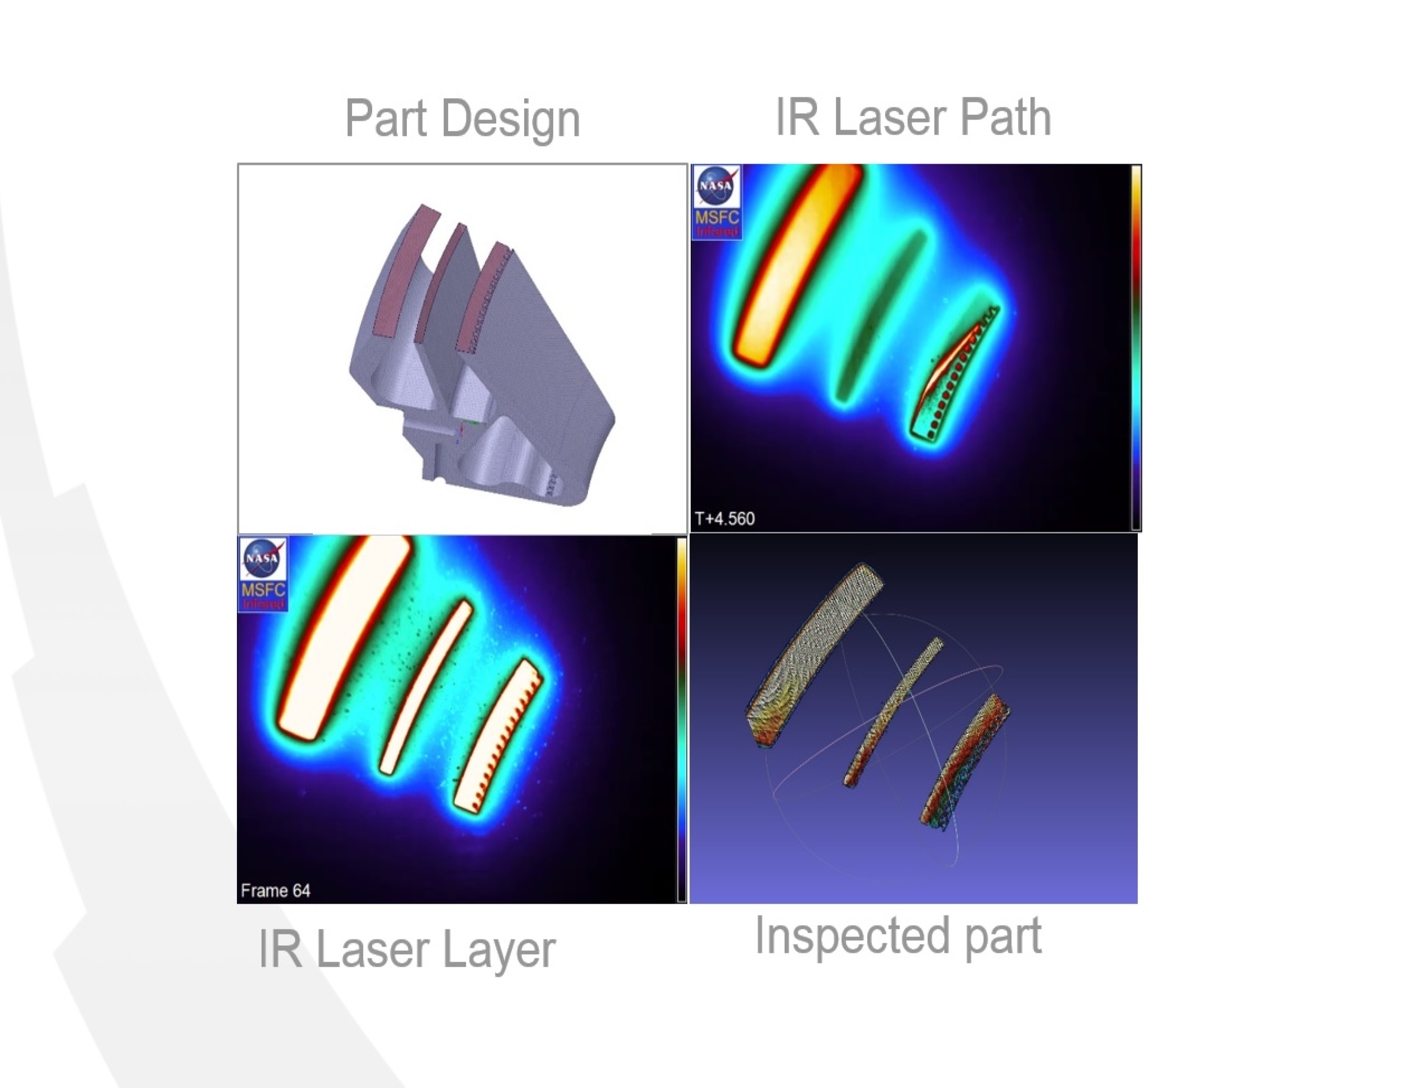
Researchers at NASA Marshall Space Flight Center have developed a novel method for interim, in situ dimensional inspection of additively manufactured parts. Additive manufacturing processes currently have limited monitoring capabilities, offering users little to no options in mitigating the high levels of product and process failures. This technology uses both infrared (IR) and visual cameras that allow users to monitor the build in real-time and correct the process as needed to reduce the time and material wasted in parts that will not meet quality specifications. The technology is especially useful for the in-process inspection of a parts internal features (e.g., fluid channels and passages), which cannot be easily inspected once the print is complete. The technology has the potential to enable the implementation of a closed-loop feedback system, allowing systems for automatic real-time corrections.
The Technology
The in situ inspection technology for additive manufacturing combines different types of cameras strategically placed around the part to monitor its properties during construction. The IR cameras collect accurate temperature data to validate thermal math models, while the visual cameras obtain highly detailed data at the exact location of the laser to build accurate, as-built geometric models. Furthermore, certain adopted techniques (e.g., single to grouped pixels comparison to avoid bad/biased pixels) reduce false positive readings.
NASA has developed and tested prototypes in both laser-sintered plastic and metal processes. The technology detected errors due to stray powder sparking and material layer lifts. Furthermore, the technology has the potential to detect anomalies in the property profile that are caused by errors due to stress, power density issues, incomplete melting, voids, incomplete fill, and layer lift-up. Three-dimensional models of the printed parts were reconstructed using only the collected data, which demonstrates the success and potential of the technology to provide a deeper understanding of the laser-metal interactions. By monitoring the print, layer by layer, in real-time, users can pause the process and make corrections to the build as needed, reducing material, energy, and time wasted in nonconforming parts.
.jpg)

Benefits
- Robust: leverages processing techniques to reduce false positive readings
- Flexible: can be implemented in existing systems
- Cost-saving: reduces time, energy, and material wasted in nonconforming parts
- Accurate: uses both IR and visual cameras for thermal and spatial accuracy
Applications
- Aerospace: complex injectors, internal coolant passage components, heat exchangers
- Automotive: exhaust system components
- Medical: orthopedic implants


