Large Area Structural Damage Nondestructive Evaluation
Sensors
Large Area Structural Damage Nondestructive Evaluation (LAR-TOPS-247)
System and method for wide Area in-situ measurement of progressive damage and determination of failure in a structure during loading
Overview
When testing composite structures, it is important to understand the response of the structure to the load. Of significance is the formation of damage and growth of that damage leading to ultimate failure. Understanding how a structure fails allows for optimal designs for improved safety and performance for the part during its life cycle. Inspection methods are required to determine damage initiation and growth in advanced composite structures during loading. Past methods for in-situ inspection of composite structures during loading have involved acoustic emission, passive thermography, digital image correlation, and fiber optics techniques. However, each of these has critical limitations. The combination of thermal and acoustic emission (AE) nondestructive evaluation (NDE) techniques, by mapping the acoustic emission events onto the thermal imagery, provides a very sensitive measurement system for detecting damage formation and growth.
The Technology
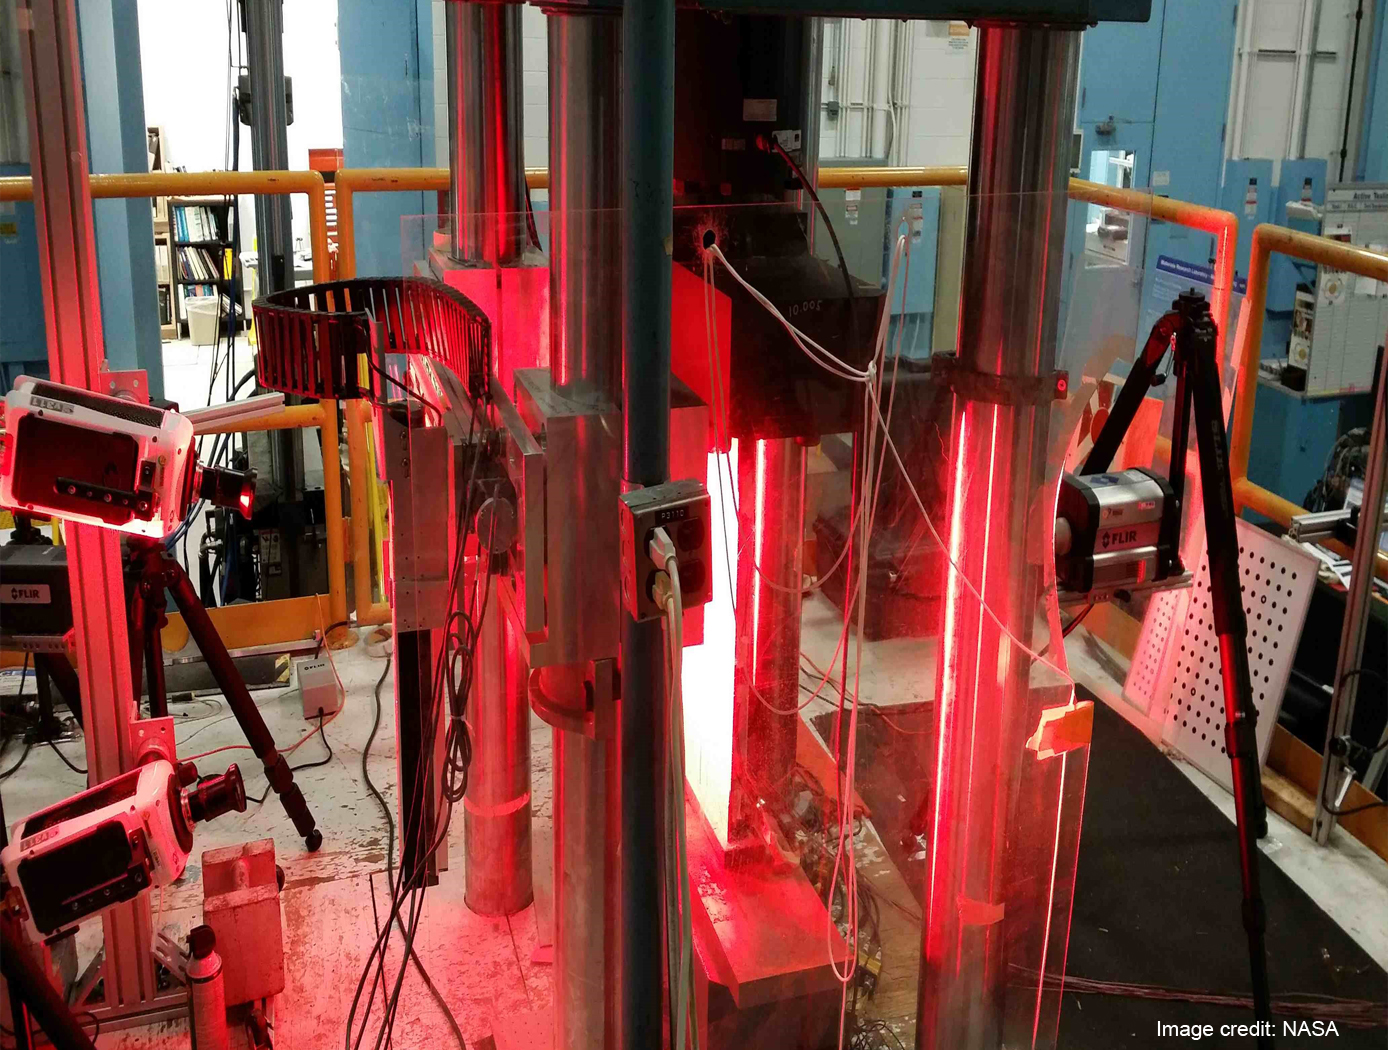
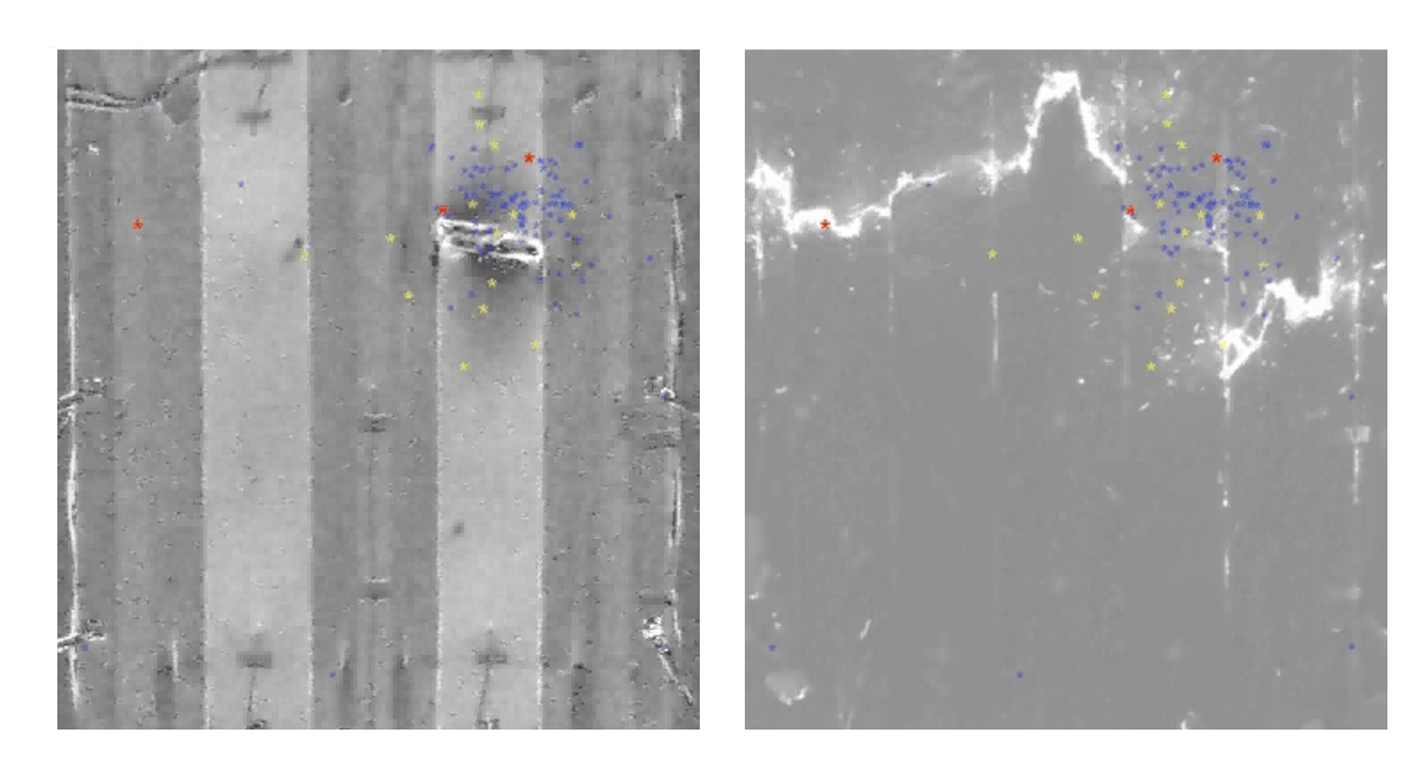
This technology provides a methodology to measure damage onset and grow at multiple locations in a composite structure during fatigue loading. The thermography inspection is non-contact and can cover very large areas. The acoustic emission sensors require contact at only the sensor attachment points and can cover large areas. The acoustic emission measurement is very sensitive to damage formation events such as matrix cracking, fiber breaks, and delamination, however the event location is approximate. An infrared camera is able to detect damage growth and location at areas of heating (due to fiber breaks, rubbing of disbond areas and matrix cracks) and thus confirm the acoustic emission measurements. If the loading is cyclic the infrared camera is also able to detect the relative depth of the damage. Combining both technologies helps to reduce false indications, confirm damage growth areas and where ultimate failure will occur. This provides a measurement capability to detect growing damage (location and size) for improved structures testing or during in-service applications. Multiple infrared (IR) cameras and multiple acoustic emission sensors can be employed internally or externally for full coverage of the structure. When significant damage growth is detected, the structure can be taken out of service for repair or for further inspections. This technology has been demonstrated for structures testing. In-situ NDE inspections are necessary to provide structural engineers a tool to incrementally control and document damage growth as a function of fatigue cycles before failure. This allows for the comparison of NDE results to develop and validate progressive damage analysis (PDA) models. The ultimate goal is to use the validated PDA models to decrease the time required to certify composite structures and therefore save development costs. Real time NDE can document the progression of damage and provide the documentation of ultimate failure mechanisms.


Benefits
- A very sensitive measurement system for detecting damage formation and growth in real time
- Synchronizes both acoustic emission and thermal to loading to improve how to process and interpret AE and thermography indications
- Maps the AE over the thermography image to locate areas with heating with the clustered AE events that reveal where the structure will fail and ignore false indications
- Tracks multiple damage sites and correlate the AE event with the associated thermal signature
Applications
- Advances the state of the art in materials testing by providing a real time and large area inspection capability for determining damage onset and growth in a structure under load testing
- Tracks damage to determine the ultimate failure progression of complex structures such as advanced composites
- Helps the aerospace industry to design, build and test complex advanced composite structures
Technology Details
Sensors
LAR-TOPS-247
LAR-18754-1
Combining Passive Thermography and Acoustic Emission for Large Area Fatigue Damage Growth Assessment of a Composite Structure, Joseph N. Zalameda, Michael R. Horne, Eric I. Madaras, and Eric R. Burke, Thermosense: Thermal Infrared Applications XXXVIII, April 18-21, 2016 https://ntrs.nasa.gov/api/citations/20160009062/downloads/20160009062.pdf
Real Time Fatigue Damage Growth Assessment of a Composite Three-Stringer Panel Using Passive Thermography, Joseph N. Zalameda, Eric R. Burke, Michael R. Horne, and James B. Bly, 2015 SPIE Thermosense Conference, Baltimore, MD, April 20-24, 2015, https://ntrs.nasa.gov/api/citations/20150010963/downloads/20150010963.pdf
Real Time Fatigue Damage Growth Assessment of a Composite Three-Stringer Panel Using Passive Thermography, Joseph N. Zalameda, Eric R. Burke, Michael R. Horne, and James B. Bly, 2015 SPIE Thermosense Conference, Baltimore, MD, April 20-24, 2015, https://ntrs.nasa.gov/api/citations/20150010963/downloads/20150010963.pdf
Similar Results

Enhanced Software Suite Maximizes Non-Destructive Evaluation (NDE) Methods
This technology provides comprehensive, detailed, and accurate NDE detection and characterization of subsurface defects in composites and some metallic hardware. This complete software suite normalizes and calibrates the data, which provides more stable measurements and reduces the occurrence of errors due to the operator and to camera variability.
When using flash IR thermography to evaluate materials, variations in the thermal diffusivity of the material manifest themselves as anomalies in the IR image of the test surface. Post-processing of this raw IR camera data provides highly detailed analysis of the size and characterization of anomalies. The newly incorporated Transient and Lock-In Thermography methods allow the analysis of thicker material and with better flaw resolution than Flash Thermography alone.
The peak contrast and peak contrast time profiles generated through this analysis provide quantitative interpretation of the images, including detailed information about the size and shape of the anomalies. The persistence energy and persistence time profiles provide highly sensitive data for detected anomalies. Peak contrast, peak time, persistence time, and persistence energy measurements also enable monitoring for flaw growth and signal response to flaw size analysis.
This technology is at a technology readiness level (TRL) of 7 (system prototype demonstration in an operational environment), and the innovation is now available for your company to license. Please note that NASA does not manufacture products itself for commercial sale.

Advanced Thermal Inspection with Pulsed Light Emitting Diodes (PLED) Technology
NASA’s PLED thermal inspection system consists of an array of high- powered LED chips configured to deliver controlled pulses of visible light. The system includes 8 LED chip arrays, mounted on an aluminum heat sink and housed in a hood configuration. The inspection hood is specially designed with filters to prevent internal reflections. The LEDs are powered by regulated power supplies and controlled via a computer interface that synchronizes heat pulses with an infrared camera. An acrylic filter is placed over the LEDs to block residual infrared radiation, ensuring that only visible light reaches the target surface. The system’s infrared camera, operating in the mid-wave infrared (MWIR) range does not detect the visible light and captures the transient thermal response of the material, allowing for precise defect detection. By eliminating the need for high-intensity broadband infrared sources, the PLED system provides a cleaner and more accurate thermal response, particularly for unpainted metals and additively manufactured (AM) components.
Performance validation of the PLED system has demonstrated significant advantages over traditional flash thermography. In tests on aluminum samples with material loss and AM Ti-6Al-4V metal specimens, the PLED system successfully detected defects with superior contrast and no heat source reflections. Principal Component Analysis (PCA) applied to PLED inspection data revealed clearer defect indications compared to flash-based methods, which introduced unwanted artifacts due to transient reflections. Additionally, the PLED system enabled quantitative thermal diffusivity measurements, offering a new approach to single-sided material characterization.
NASA's PLED thermal inspection technology is available for patent licensing. Potential applications include corrosion detection in aerospace components, quality control of AM metal parts, structural health monitoring of industrial materials, and more.

System for In-situ Defect Detection in Composites During Cure
NASA's System for In-situ Defect (e.g., porosity, fiber waviness) Detection in Composites During Cure consists of an ultrasonic portable automated C-Scan system with an attached ultrasonic contact probe. This scanner is placed inside of an insulated vessel that protects the temperature-sensitive components of the scanner. A liquid nitrogen cooling systems keeps the interior of the vessel below 38°C. A motorized X-Y raster scanner is mounted inside an unsealed cooling container made of porous insulation boards with a cantilever scanning arm protruding out of the cooling container through a slot. The cooling container that houses the X-Y raster scanner is periodically cooled using a liquid nitrogen (LN2) delivery system. Flexible bellows in the slot opening of the box minimize heat transfer between the box and the external autoclave environment. The box and scanning arm are located on a precision cast tool plate. A thin layer of ultrasonic couplant is placed between the transducer and the tool plate. The composite parts are vacuum bagged on the other side of the tool plate and inspected. The scanning system inside of the vessel is connected to the controller outside of the autoclave. The system can provide A-scan, B-scan, and C-scan images of the composite panel at multiple times during the cure process.
The in-situ system provides higher resolution data to find, characterize, and track defects during cure better than other cure monitoring techniques. In addition, this system also shows the through-thickness location of any composite manufacturing defects during cure with real-time localization and tracking. This has been demonstrated for both intentionally introduced porosity (i.e., trapped during layup) as well processing induced porosity (e.g., resulting from uneven pressure distribution on a part). The technology can be used as a non-destructive evaluation system when making composite parts in in an oven or an autoclave, including thermosets, thermoplastics, composite laminates, high-temperature resins, and ceramics.

Fast & Accurate Composite Bond Strength Measurement
NASA's Method of Evaluating Adhesive Bond Strength is an accurate, robust, quantitative, and nondestructive bond strength measurement method that meets an immediate need in composite manufacturing. Even with careful control of the bonding procedure, destructive testing has shown that bonded joint strength shows substantial variation. Prior art in the field is insensitive to weak interfacial bonding, which leads to poor service life and potential catastrophic failure. Using NASA's method, phase measurements are acquired at a single frequency and then swept to obtain measurements at other frequencies. Narrowband filtering removes extraneous frequencies, which allows for much lower phase measurement uncertainty than other methods. Digital sine wave generation allows for better phase measurement resolution. The resultant system is a phase-based ultrasonic measurement tool for interrogating bonded joints and detecting weak adhesion with superior sensitivity than the state of the art. This new method models adhesive interfaces as a distributed spring system, where the interfacial stiffness constants of the joint can be determined from the zero- crossing frequency of the phase response and the "sharpness" or slope of the phase response. Previous theoretical research has shown that a linear correlation exists between interfacial stiffness constants and mechanically-measured interfacial bond strength. As such, the ultrasonic phase measurement method identifies intermediate bond strengths, rather than simply detecting good or bad bonds. This technique verifies bond quality in metal and composite joint systems, including those commonly found in aerospace, automotive, and many other transportation and infrastructure designs. The demonstrated ultrasonic phase method is applicable to a variety of bonding material systems.

Guided wave-based system for cure monitoring of composites using piezoelectric discs and fiber Bragg gratings (FBGs)
This system connects the properties of the guided waves to the phase changes of a composite part. The system measures temperature, strain, and guided waves during cure almost simultaneously. During life-cycle monitoring, it is feasible to use embedded fiber optic sensors for both load monitoring because of the ability to measure strain and damage detection because of the ability to record ultrasonic guided waves. The guided wave system is incorporated directly into standard curing equipment and technique. It has also been tested and works with flat panels as well as complex structures. The technology would be valuable to manufacturers of aircraft parts (fuselage, wing and other sections), marine hull sections, high speed rail sections, automotive parts and perhaps even building parts. One major application that exists presently, is the fabrication of fuselage and wing sections for aircraft where carbon fiber composite sections are used such as Boeing's 787 Dreamliner.


